This add-on adds a new Nested Form field type in your Forms to create more functional and complex forms. You can even customize the looks of the form and it works flawlessly with Gravity Forms Repeater.
This plugin adds a new Nested Form field type. This field allows you to select another form that will be used to collect “child” entries and attach them to the “parent” entry on submission. The child entries display in a clean, compact table on the parent form where they can be viewed, edited or deleted.
Yes, it sure can work as a Gravity Forms repeater add-on! While Nested Forms can perform much more complex functionality, it can be used as a simple Gravity Forms Repeater field, as well. A repeater allows you to dynamically add additional fields to a WordPress Gravity Form. GF Nested Forms differs only in that it allows you to submit the group of repeating fields (i.e. repeater fields) via a modal.
Features
- Simplify complex forms & collect repeatable data.
Create forms that are easier for you to manage and easier for your users to complete. - Register groups and individuals on the same form.
Register a team and players or a company and employees or a make and models all on the same form. - Use sum, total and count in calculations.
Pull data from your nested forms into your parent form for powerful, dynamic calculations. - Control the look & feel.
Helpful UI, flexible templating, and handy hooks. - Process feeds for child entries.
On child form submission – or – only when the parent form is submitted; allows you to do things like register a user for each child entry. Insane! - Powerful developer options.
Well-documented hooks and a flexible templating system make extending this WordPress plugin a breeze. - Easy & accessible.
Nested Form fields are fully navigable by keyboard and work well with screen readers. - Automatic updates.
Get updates and the latest features right in your dashboard. - Awesome support.
We’re here to help! And we mean it.
Documentation
- How do I enable this functionality?
- Feature Details
- Nested Form Field
- General Settings
- Nested Form
- Summary Fields
- Summary Fields: Row ID
- Entry Labels
- Appearance Settings
- Advanced Settings
- Entry Limits
- On the Frontend
- On the Backend
- Child Entries
- The {Parent} Merge Tag
- Populate Child Form Fields with Parent Form Data
- Display Parent Data in Child Form Notifications
- Feed Processing
- Calculations
- Templating
- Available Templates
- Templating Hooks
- Exporting
- Accessibility and Usability
- Keyboard Navigation
- Screen Reader Support
- Duplicate Entries
- FAQs
- What happens to child entries when the parent entry is never submitted?
- How do I dynamically populate a Nested Form field?
- How to set a Nested Form as required?
- How do I include Nested Entry totals or Gravity Forms repeater totals in the Parent Form total?
- How can I consolidate child products in the parent form’s order summary?
- Why are my child entries not counting towards the parent form’s total?
- How do I show a single value from each child entry?
- Am I able to add a conditional field within the nested section?
- Can I set dynamic min/max Entry Limits?
- How do I display a table for Nested Form fields in Confirmations and Notifications?
- Is there a way to reorder the columns in the Nested Form field table?
- How do I map child form data in a parent form feed?
- Can I improve the look of confirmation emails when using the WooCommerce Gravity Forms Products Add-Ons plugin?
- Can I customize the output of a Nested Form field in GravityView?
- How can I programmatically create Nested Form entries?
- Can I add a child entry automatically?
- Can I show Parent form data in a Child form’s notifications?
- Known Limitations
- Hooks
- Related Articles
How do I enable this functionality?
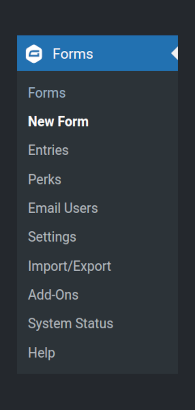
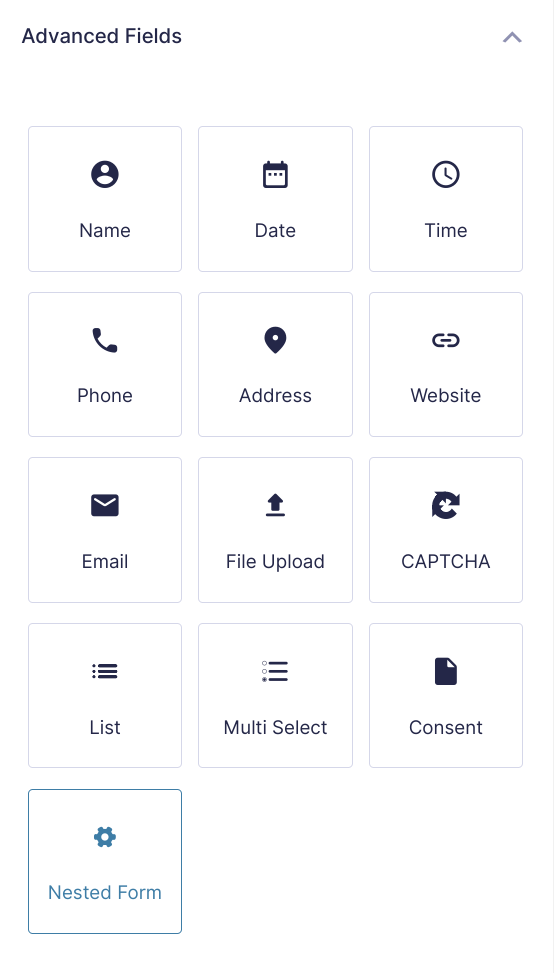
After installing and activating the Gravity Forms add-on Nested Forms, you’ll want to add a Nested Form field to your form. Let’s step through that process.
 | Create two forms; a parent form and a child form using the form editor. The child form will be “nested” in the parent form via the Nested Form field. |
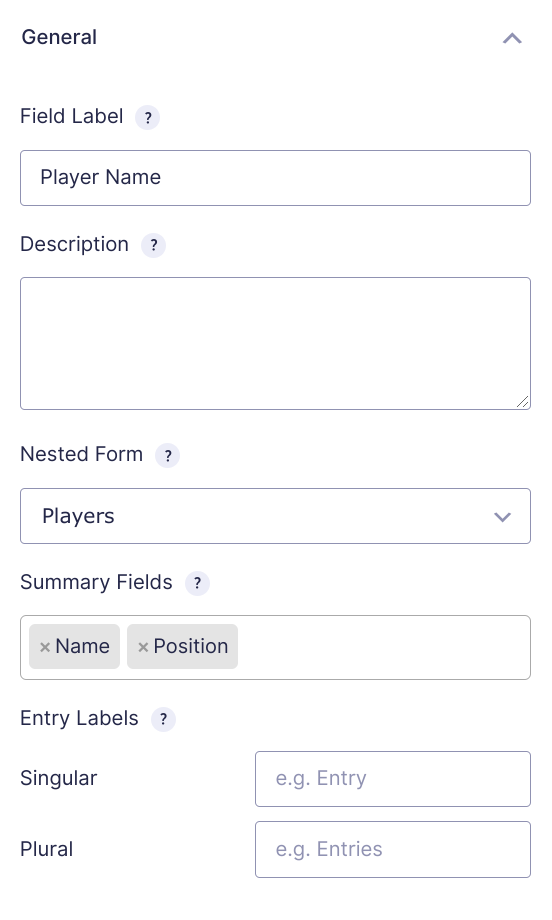
 | Add a Nested Form field on your parent form and select your child form in the Nested Form field setting. |
 | Select which fields from the child form should be displayed in the Nested Form field on the parent form. |
Now that you have your first Nested Form field, let’s dig into the specifics of its settings and how it can be configured.
Feature Details
General Settings
Select the form that should be used to create nested entries for current form.
Summary Fields
Select which fields from the nested entry should be displayed in the table on the parent form.
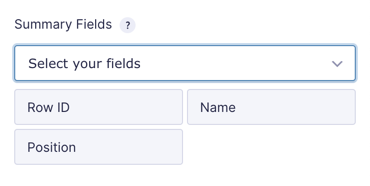
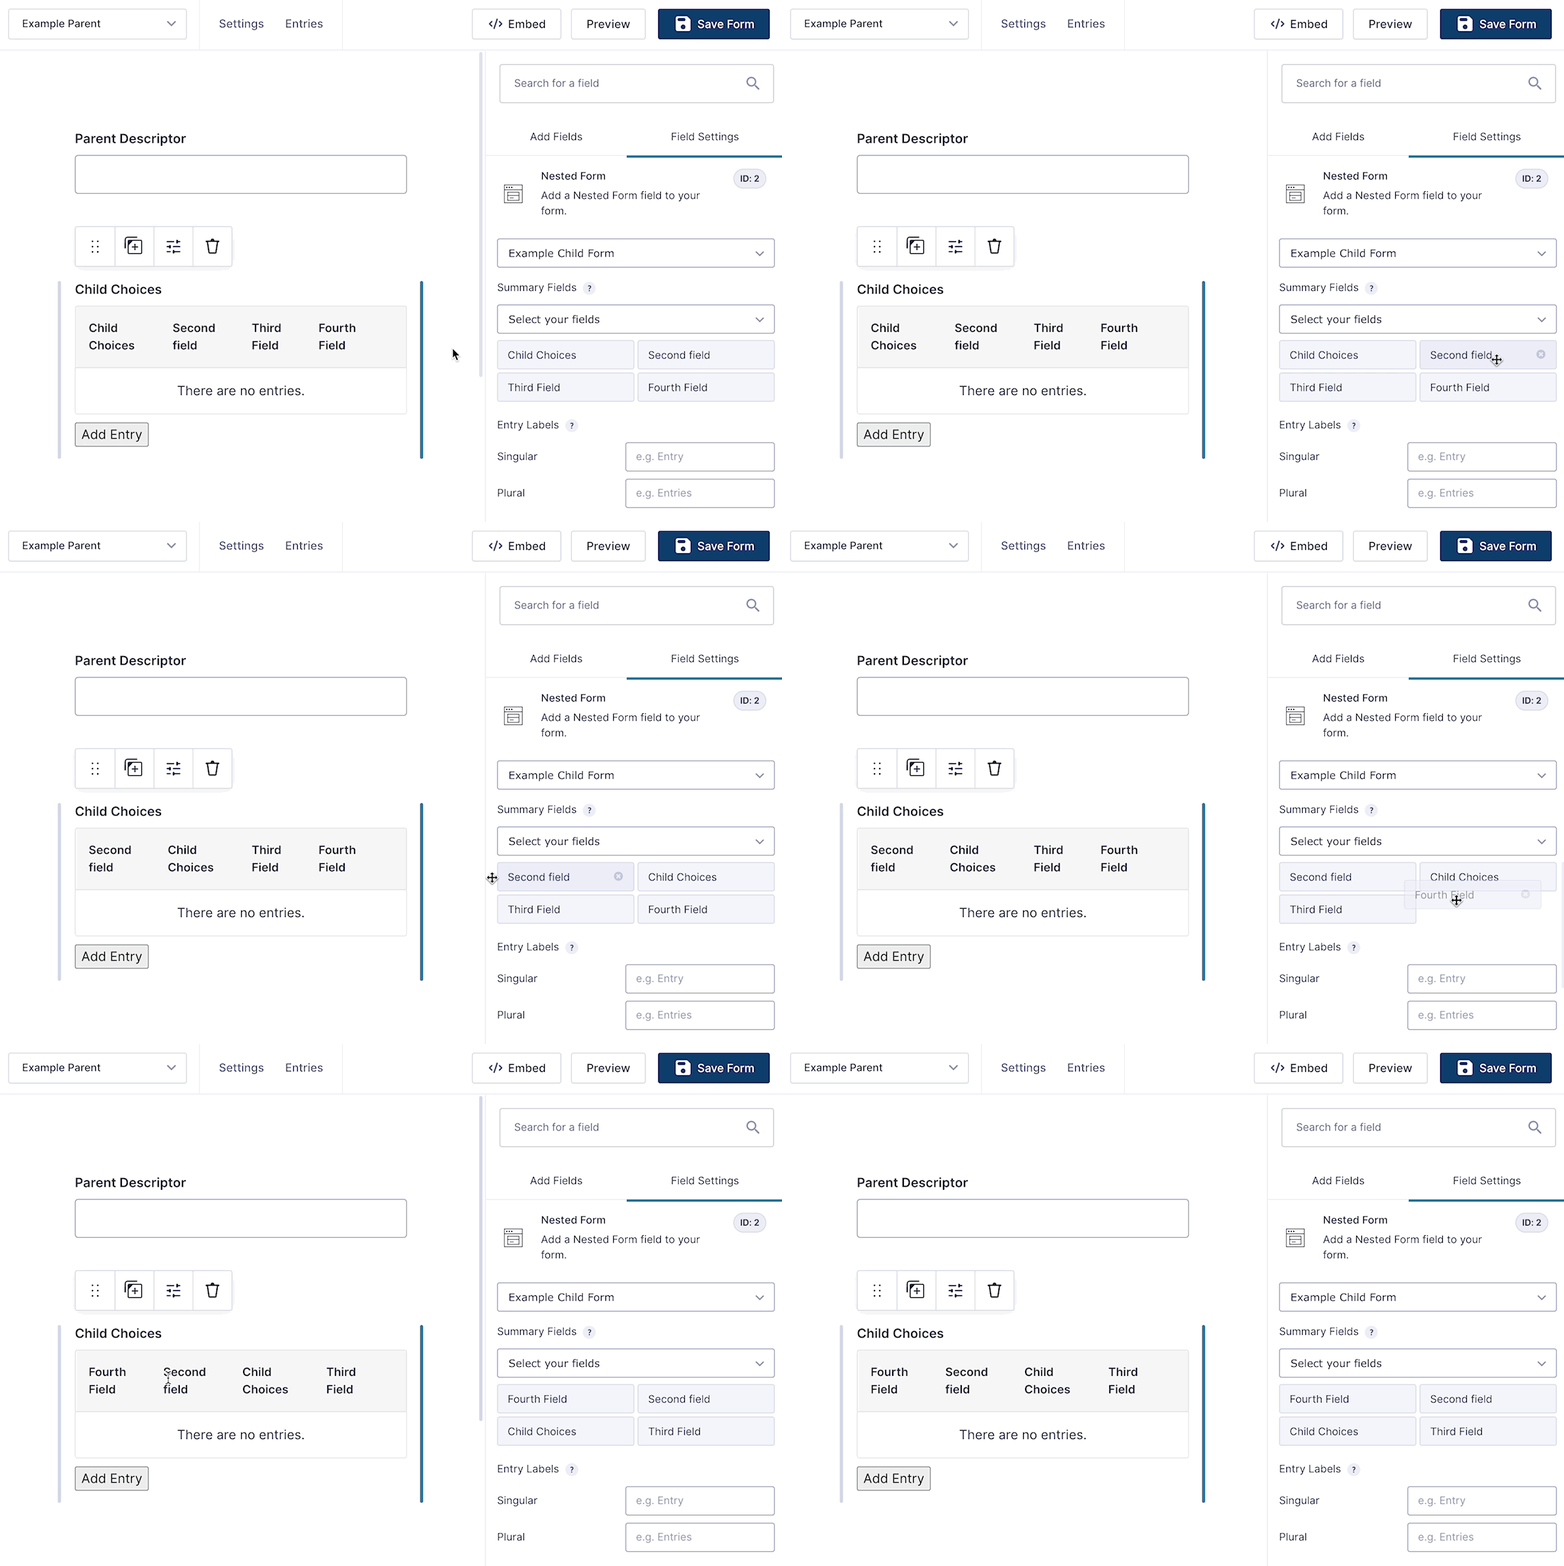
To reorder columns in the Nested Form field table, drag and drop the summary fields, like this:
Notes:
- This setting only impacts which fields from the nested form appear on the parent form. The modal will always show all fields that belong to the child form.
- This setting was previously called “Display Fields”.
Summary Fields: Row ID
The Row ID is a special Summary Field only available in Nested Form fields.
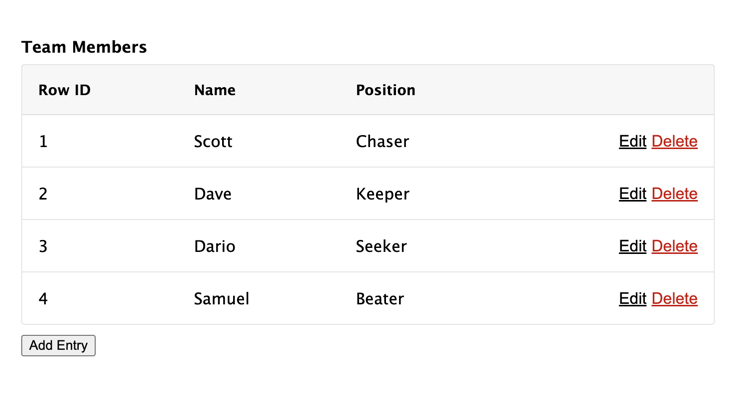
Adding the Row ID Summary Field will automatically assign each child entry a row ID number based on its order in the Nested Form field. Row ID numbers are updated as new entries are added and existing entries are duplicated or deleted.
Entry Labels
Specify a singular and plural label with which entries submitted via this field will be labeled (i.e. “player”, “players”).
Appearance Settings
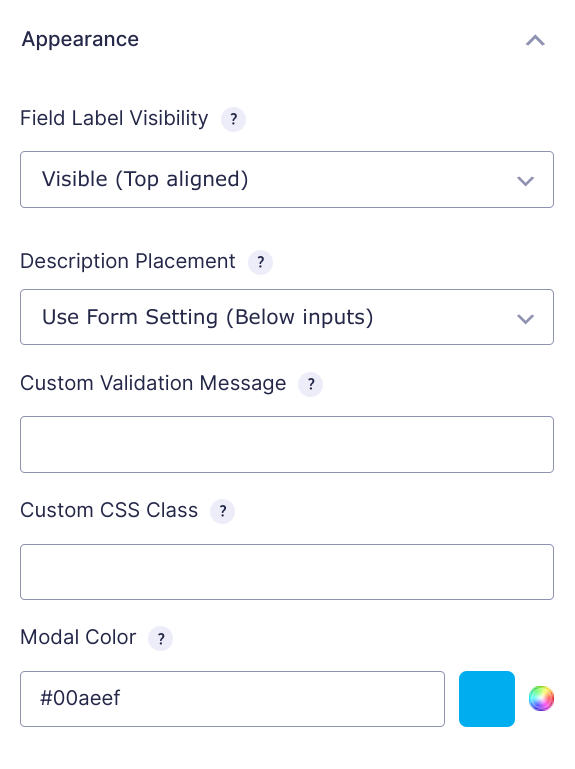
Select a color which will be used to set the background color of the nested form modal header.
Advanced Settings
Entry Limits
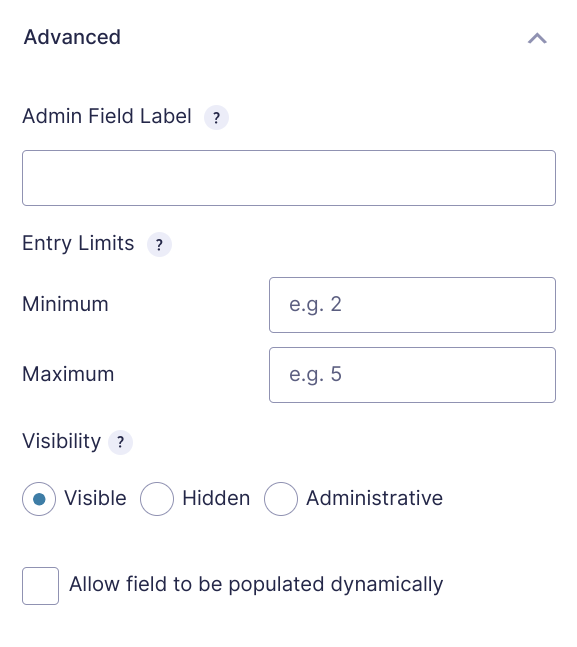
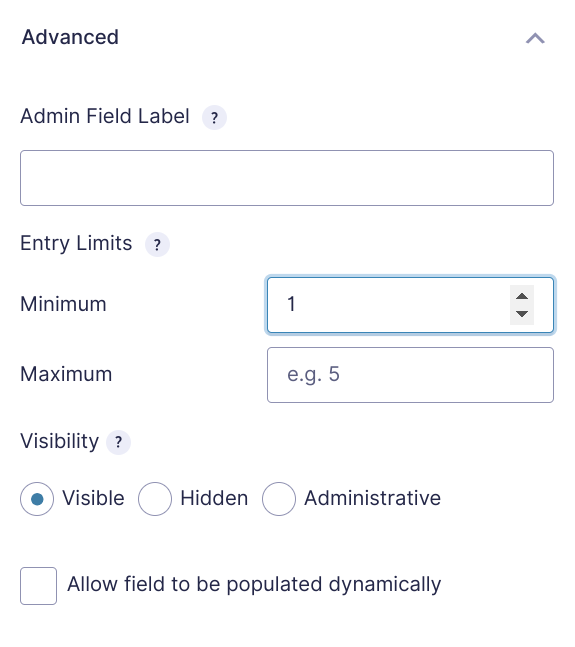
Specify the minimum and maximum number of entries that can be submitted for this field.
Dynamic Entry Limits
Use
this snippet to dynamically set the Entry Limits based on a Parent form field’s value.
On the Frontend
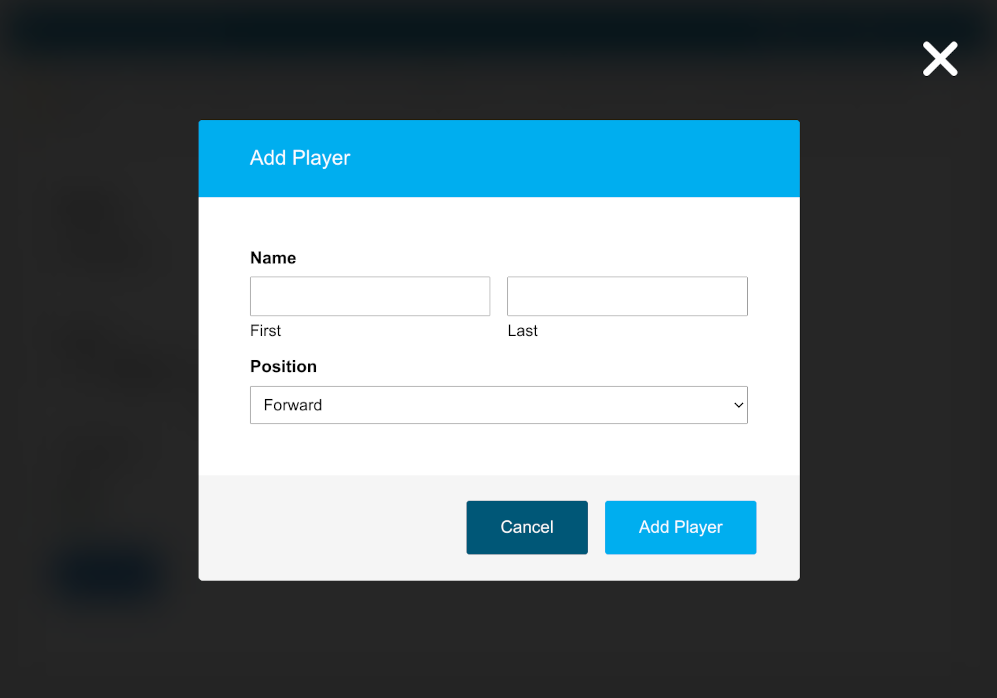
By default, child entries will be displayed in a clean, compact table. Click the Add button to add a new child entry.
 Nested Forms Modal with Default Gravity Forms Styles
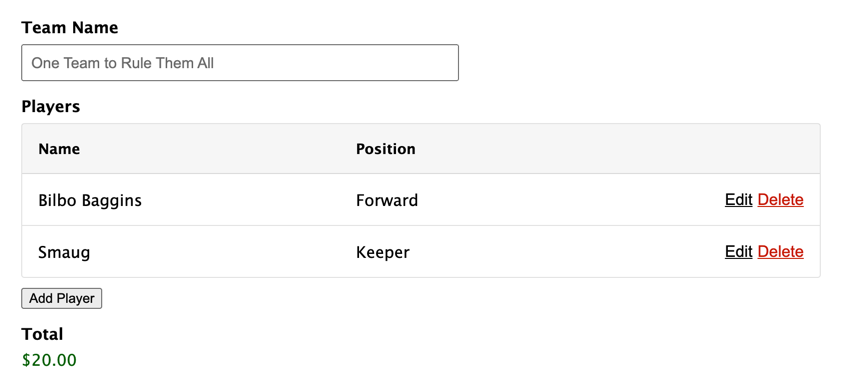
The Display Fields selected in the field settings will be displayed for each submitted child entry. Child entries can be edited by clicking Edit and deleted by clicking Delete.
 Nested Forms Entries with Default Gravity Forms Styles
On the Backend
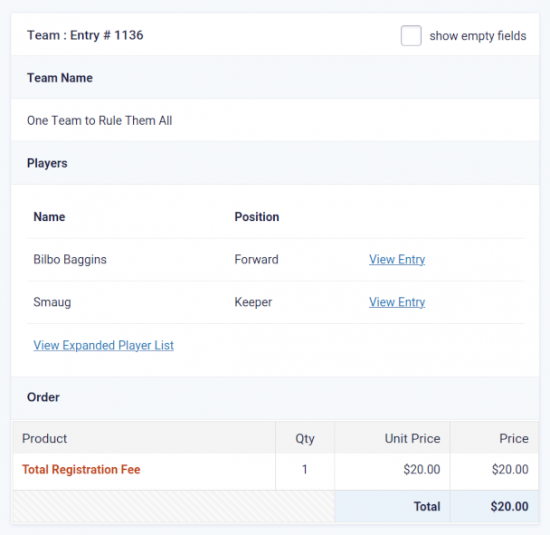
The backend will also display the configured Display Fields for each child entry. To view the full child entry click the View Entry button. To view the child entries in the Gravity Forms list view, clicking View Expanded {Item} List.
Child Entries
Child entries are entries that are submitted via a Nested Form field. For examples of how child entries are displayed on the frontend and on the backend, see the respective section.
When a parent entry is trashed, its child entries will be trashed as well.
In order to protect the user from accidental data loss, child entries will be repopulated into the Nested Form field if the parent form is reloaded.
The {Parent} Merge Tag
The special {Parent} merge tag allows you to 1) populate data entered into the parent form into the child form and 2) populate data submitted on the parent entry in child form notifications.
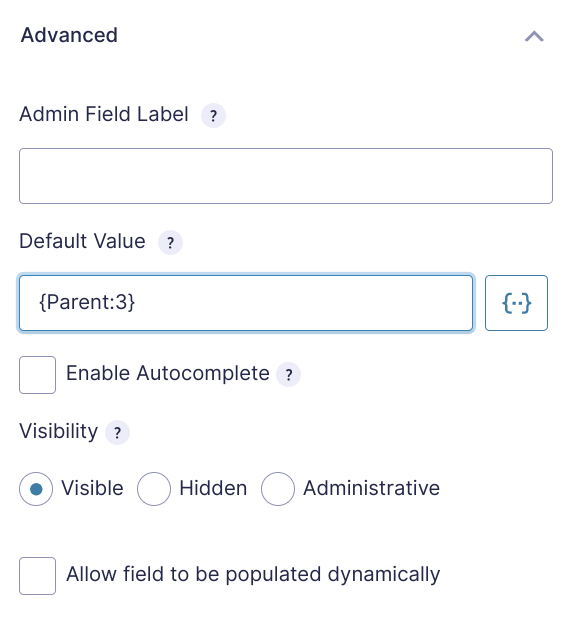
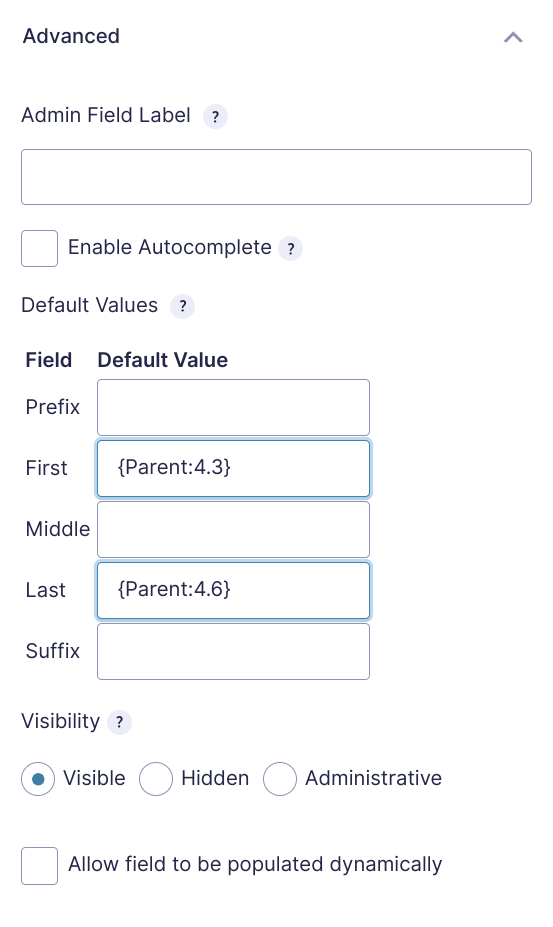
Any field on the child form that supports a default value can be populated via the {Parent} merge tag. Currently, you must manually specify the field/input ID from the parent form that should be populated into the child form. In the following example, we’ll populate the value of field ID 3 from the parent form into field ID 1 on the child form.
To populate multi-input fields (like the Name field), you will need to specify the input ID (which includes the field ID and the input index).
Here is a quick reference guide for the input indexes of common field types. The input ID will always use the FIELDID.INPUTID format. For example, a field ID of 2 and an input index of 3 would give you an input ID of 2.3.
All examples assume a field ID of 1.
| INPUT NAME | INDEX | EXAMPLE |
|---|
| Name Field | | |
| Prefix | 2 | {Parent:1.2} |
| First | 3 | {Parent:1.3} |
| Middle | 4 | {Parent:1.4} |
| Last | 6 | {Parent:1.6} |
| Suffix | 8 | {Parent:1.8} |
| Address Field | | |
| Street Address | 1 | {Parent:1.1} |
| Address Line 2 | 2 | {Parent:1.2} |
| City | 3 | {Parent:1.3} |
| State / Province | 4 | {Parent:1.4} |
| Zip / Postal Code | 5 | {Parent:1.5} |
| Country | 6 | {Parent:1.6} |
The {Parent} merge tag can also be used to display data from the parent entry in the notification send for a child entry. The desired entry property must be manually specified. For example, if you want to fetch the parent entry ID, you would use {Parent:id}. If you want to fetch the parent entry creation date, you would use {Parent:date_created}.
All properties of the entry object are supported. For a full list, see Gravity Forms’ Entry object documentation.
Feed Processing
By default, GF Nested Forms will only process feeds attached to the nested form after the parent form is submitted.
A practical example of this would be a parent form that creates a team and a nested form that uses the User Registration to register players. In most cases, you wouldn’t want the user accounts created for the players until the team submission has been finalized. GF Nested Forms handles this for you automatically.
If a feed attached to the parent entry has any delayed options enabled (i.e. User Registration), child form feeds are delayed and processed when the parent entry payment is completed.
In some cases, you may want to trigger the nested form feed to be processed when the nested form is submitted (e.g. collecting emails for a mailing list via MailChimp). To do this, use this snippet to enable the advanced Feed Processing setting:
add_filter( 'gpnf_enable_feed_processing_setting', '__return_true' );
And then select, “nested form” in the select.
A child entry is always created from a child form submission. The Feed Processing setting does not impact this behavior.
For even more granular control over when nested feeds are processed, use the gpnf_should_process_feed filter.
Calculations
GF Nested Forms provides support for using Nested Form fields in your Gravity Forms calculations. To use a Nested Form field in your calculation formula, you will need to manually type the desired merge tag using the following template:
{FIELD_LABEL:FIELD_ID:MODIFIER}
The following examples are based on a field label of “Players” and a field ID of “1”.
- count – Returns the total number of child entries attached to the Nested Form field. If there are two child entries submitted for a Nested Form field, this merge tag would return
2.{Players:1:count} - total – Returns the sum of all child entry totals. For example, if Child Entry #1 has a total of
$10 and Child Entry #2 has a total of $25, this merge tag would return 35.{Players:1:total} - sum – Returns the sum of the specified target field’s value from each child entry. For example, you had a Quantity field with an ID of “2” on your nested form and Child Entry #1 had a quantity of
2 and Child Entry #2 had a quantity of 3, this merge tag would return 5.{Players:1:sum=2} - set – Returns a comma-delimited set of the specified target field’s value from each child entry. For example, you had a Number field with an ID of “2” on your nested form and Child Entry #1 had a quantity of
1 and Child Entry #2 had a quantity of 3, this merge tag would return 1, 3.{Players:1:set=2}The :set modifier is designed to work with any GF Advanced Calculations math function that accepts a set of numbers (e.g. min(), max()).
Templating
You can take complete control over the Nested Form field output via the templating system. To do so, you will need to copy the template files from the plugin to your theme.
In the plugin, they’re located in the templates directory:
/gp-nested-forms/templates
In your theme, you will need to create a directory named gp-nested-forms and copy the template files there:
/your-theme/gp-nested-forms/
Now anytime GF Nested Forms attempts to load a template file, it will pull your version of the template file from your theme.
Available Templates
- nested-entries.php – Used to render the child entries in a Nested Form field on the frontend.
- nested-entries-detail.php – Used to render the child entries on the entry detail page (in the Gravity Forms backend).
- nested-entries-simple-list.php – Used to render a single value from each child entry in a simple list format when the Nested Form field merge tag (or {all_fields} merge tag) is filtered to a single field via the All Fields Template plugin (e.g.,
{Players:1:filter[2]}). - nested-entry.php – Used to render a single child entry via the Nested Form field merge tag (e.g.
{Players:1} – or – when a Nested Form field is rendered via the {all_fields} merge tag.
Templating Hooks
To make minor changes to verbiage or customize the data that will be used to render the Nested Form field, use the gpnf_template_args filter.
Exporting
Child entries can be exported together with their parent entry. Select the parent form on the Export Entries page and select the child fields you want to export alongside the parent entry. For more details, see our tutorial on Exporting with Nested Forms.
By default, the Parent entry data will output on a single line above the corresponding child entries.
Use the gpnf_export_parent_entry_data_on_child_entry_rows hook to export the Parent entry data on every Child entry row.
Accessibility and Usability
Keyboard Navigation
All action elements use <button>‘s for consistent interaction for keyboard-centric users. When the Nested Form field’s modal is opened, the focus is trapped within the modal. This means you can tab in a circular loop through all form fields and modal actions. This keeps your users in context and focused.
Screen Reader Support
Nested Forms supports screen readers for all Nested Form field interactions. Screen readers will announce when the modal has been opened, which child entry you are about to edit or delete, and each action available within your Nested Forms modal. This makes it much easier for visually impaired readers to use your forms.
Duplicate Entries
Entry duplication can be activated using the gpnf_enable_duplication hook. Once activated, the Duplicate option will display in the Nested Form field.
FAQs
What happens to child entries when the parent entry is never submitted?
Child entries with no parent entry are called orphaned entries. Orphaned entries are considered “expired” after a week. Expired entries are trashed daily. To modify how long orphaned entries should be preserved, use the gpnf_expiration_modifier filter.
If the user returns the form, their orphaned child entries will be repopulated into the Nested Form field.
Nested Form fields can be dynamically populated the same way as other Gravity Forms fields. Nested Form fields expect a comma-delimited list of entry IDs for the dynamic population value.
To set a Nested Form or Gravity Forms repeater form as required, go to the Advanced tab of the field options window and set the Minimum field to “1” in the Entry Limits option.
How do I include Nested Entry totals or Gravity Forms repeater totals in the Parent Form total?
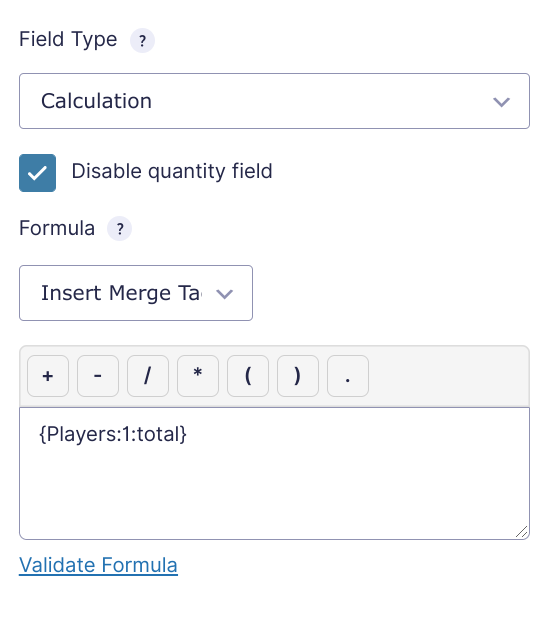
We’ll need to include a Calculated Product field on the parent form to capture the entry totals for each nested entry and automatically apply those totals towards the Parent Forms total. Here’s how to set this up in three, quick steps.
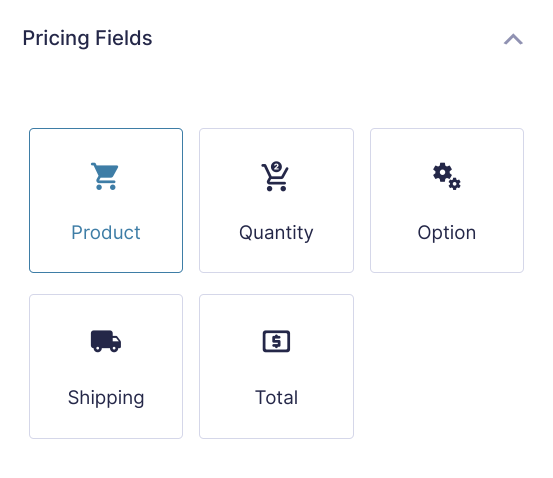
 | Add a Product field to your parent form. |
 | Set the “Field Type” setting to “Calculation” and check Disable quantity field. |
 | Manually enter the Nested Form field merge tag into the “Formula” setting and append the “:total” modifier. |
All done! See the demo at top of this page to see this live.
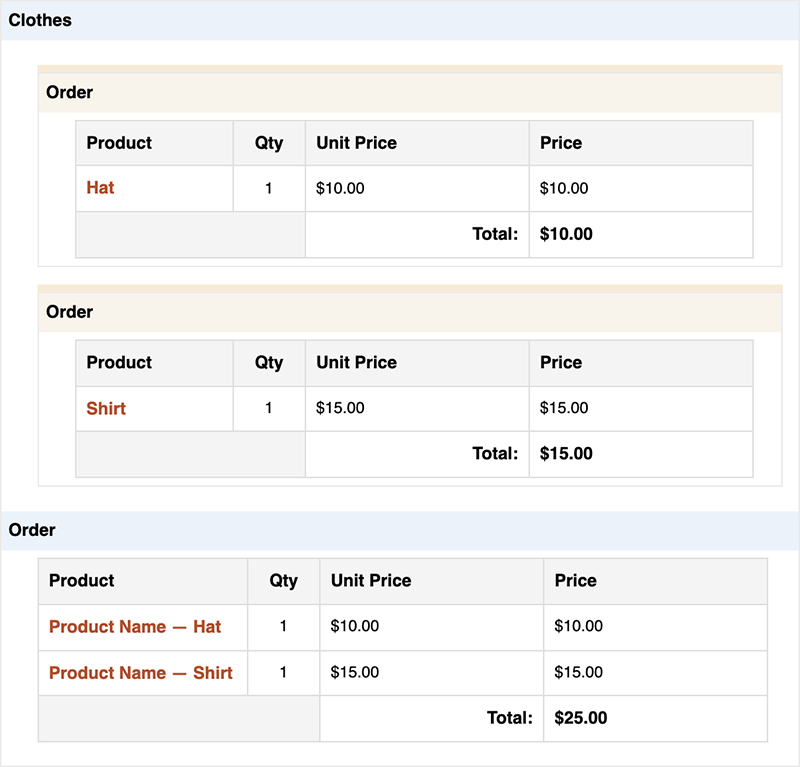
Yes! Once you have set up including Nested Entry totals in the Parent Form total](#how-do-i-include-nested-entry-totals-or-gravity-forms-repeater-totals-in-the-parent-form-total), add the following snippet to also include the Child Entry products in the Parent Product field when viewing the Order Summary.
Once the snippet has been added, any time the :total merge tag modifier is used in a calculation on the Parent form, the Order Summary will automatically group Child Products into that Parent form field.

You must explicitly include child entry totals in your parent form via a Calculated Product field. See this walkthrough.
To calculate child entry totals in your parent form, the child form must contain at least one Pricing field. The :total merge tag modifier only includes Pricing fields (e.g. Products, Options, Shipping, etc). It will not include Number fields.
How do I show a single value from each child entry?
First, you’ll need to install our All Fields Template plugin. This provides the ability to filter which fields from the nested form are displayed in the Nested Form field’s merge tag (and {all_fields}).
Once installed, you can filter down to a specific field (such as single line text) like so:
{Players:1:filter[1]}
Based on our demo form, this would display a simple list of the Player’s names. This also works for Gravity Forms repeater fields.
An element with a larger z-index generally covers an element with a lower one. So if your theme has a larger z-index specified, it’ll cover the modal window from the Nested Forms field. The solution in this case is to specify a larger z-index number for the Nested Form modal window, like this: .gpnf-dialog.ui-dialog { z-index: 99999999 !important; }
Am I able to add a conditional field within the nested section?
Yup! A child form can use any of Gravity Forms core features, including conditional logic. You can also add conditional logic to the Gravity Forms repeater fields.
Can I set dynamic min/max Entry Limits?
We have a snippet to set the Nested Form field’s Entry Limits based on a Parent form field’s value. Here’s how you use it:
- Add a field to the Parent form that will contain the entry limit and note the Field ID.
- Copy and paste the snippet into your theme’s functions.php file.
- Paste the following class below the snippet.
new GP_Nested_Forms_Dynamic_Entry_Min_Max( array(
	'parent_form_id'       => 4,
	'nested_form_field_id' => 3,
	'max_field_id'         => 1,
	'min_field_id'         => 2, // (Optional)
) );
- Update the
parent_form_id to your Parent Form ID. - Set the
nested_form_field_id to the Nested Form Field ID in the Parent Form. - Set either the
max_field_id or min_field_id (or both) to the field you noted in Step 1.
When a value is entered in the field on the Parent form, GP Nested Forms will automatically adjust the minimum or maximum Entry Limits to the value in that field.
Haven’t installed a snippet before? Check out
this guide on how to install snippets.
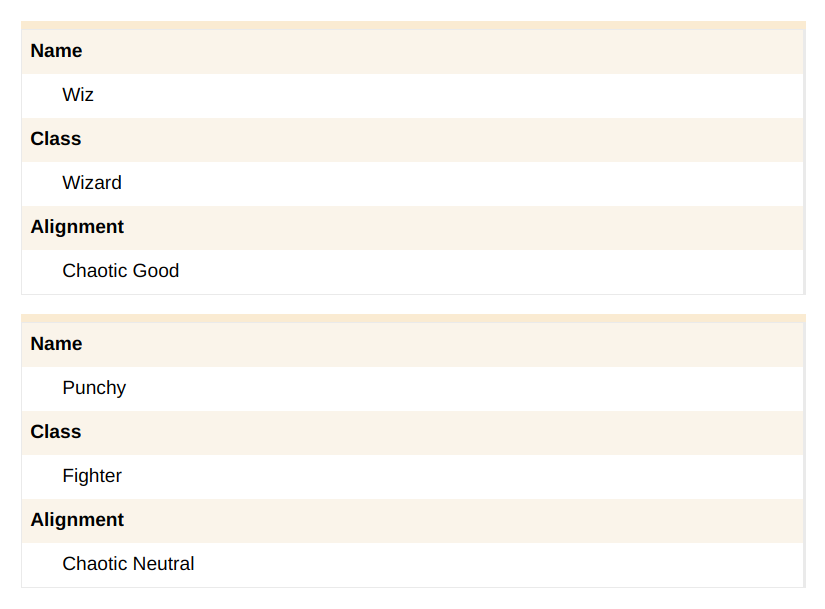
Add this snippet to your theme’s functions.php file to add an option to output a table layout for Nested Form fields. Any Confirmation or Notification that uses the {all_fields:gpnf_table} merge tag with the additional :gpnf_table modifier will be output as a table.
Here’s the output without the snippet:
And with the snippet installed:
The fields that display in the table output will match the settings in the Nested Form field. Any fields set to display in Summary Fields will output in the table. To force the table to output all Child fields, add the gpnf_all_fields modifier to the snippet, like this:
{all_fields:gpnf_table,gpnf_all_fields}.
This is not currently possible; however, you can map child form data in their own feeds configured within the child form.
By default, WC GF Product Add-Ons strips HTML from form fields, including Nested Form fields. This can be bypassed by adding this snippet to your theme’s functions.php file.
Due to the nature of how Product Add-Ons saves the display value as order meta, this change will only affect new orders.
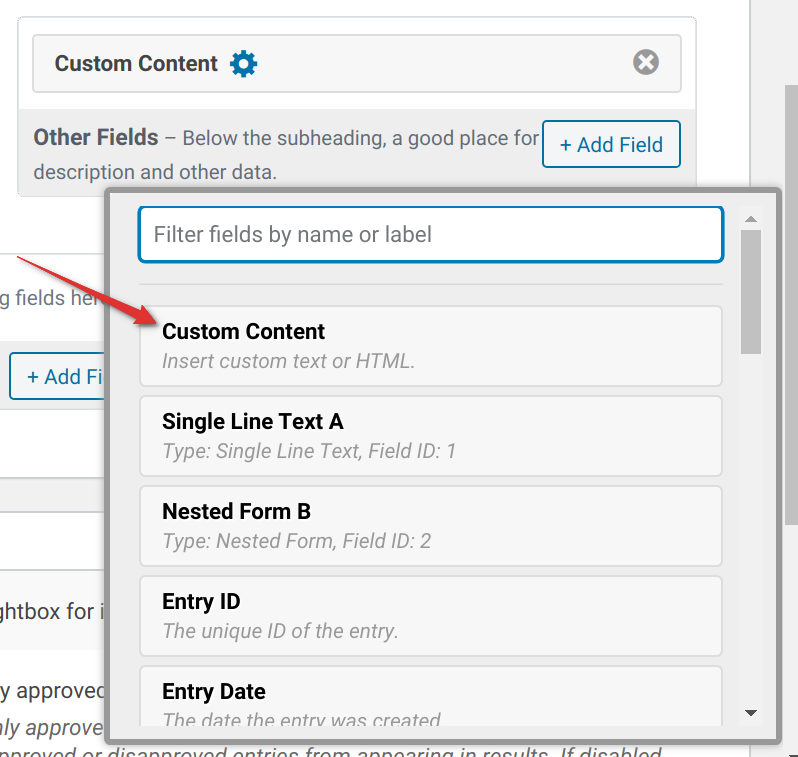
Currently the output for a Nested Form field in GravityView can’t be customized, but what you can do is instead use the Custom Content option in GravityView.
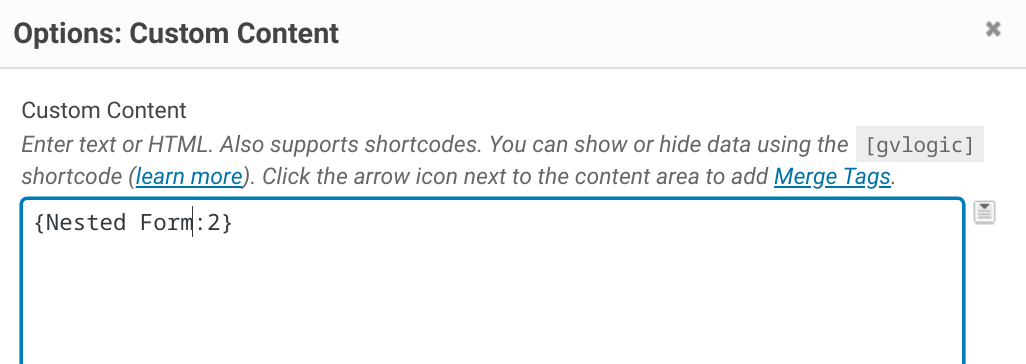
Insert the Merge tag for the Nested Form Field into the Custom Content field.
The merge tag will output our template, which you can further customize with a custom template.
You can use the Gravity Forms API to create Child entries and assign them to a Parent entry using this snippet as a model:
$new_child_entry = array(
    'form_id' => 124, // The ID of the child form.
    'created_by' => 1,
    '1.3' => 'Dave',
    '1.6' => 'Smiff',
    '2' => '(123) 123-1234',
    GPNF_Entry::ENTRY_PARENT_KEY => 234, // The ID of the parent entry.
    GPNF_Entry::ENTRY_PARENT_FORM_KEY => 123, // The ID of the parent form.
    GPNF_Entry::ENTRY_NESTED_FORM_FIELD_KEY => 3, // The ID of the Nested Form field on the parent form.
);

$child_entry_id = GFAPI::add_entry( $new_child_entry );
If you have questions about using the API to create Child entries, drop us a line.
Can I add a child entry automatically?
You can! We have a snippet that adds the ability to trigger population in a Nested Form field. It allows you to automatically add a child entry to a Nested Form field with data from your parent form. This is useful when wanting to do things like include the primary registrant as one of the child registrants in the Nested Form field.
Some tips on using it:
- Parent form field values can be inserted into the Nested Form field using the
field_map parameter. - To trigger population when any value is inserted into the
trigger_field_id, set the trigger_field_value to _notempty_.
If you have questions on configuring the snippet, drop us a line. We’re happy to help.
The following snippet adds three merge tags for use in Child form notifications: {parent_form}, {parent_field}, and {parent_entry}. When combined with merge tag modifiers, these merge tags will let you display information from the Parent entry in Child notifications.
Some example merge tag modifiers are:
{parent_form:id}{parent_form:title}{parent_field:label}{parent_entry:id}
For a more comprehensive list, refer to these docs:
Known Limitations
- You may not include a Nested Form field within a nested form.
- Solution: If you need to collect repeatable data inside a child form, we recommend using a List field or exploring the Gravity Forms Repeater API.
- You may not display a form independently if it is nested inside of a Nested Form field on the same page.
- Payment feeds will not be processed on child forms.
- By default, child notifications are sent regardless of the parent entry’s payment status. To delay child notifications until the parent entry has been paid, use this snippet.
Hooks







Reviews
Clear filtersThere are no reviews yet.